Building Your First Campaign
Talent Llama makes it easy to build a Campaign that fairly screens your applicants and moves them efficiently through the funnel, surfacing top candidates for second-round interviews in record time.
We call it a “Campaign” because it’s far more than a basic screen. Powered by AI, Talent Llama runs fully customized interviews that adapt to each candidate while keeping your selected Topics consistent across all applicants. It evaluates skills, measures qualifications, and automatically filters out candidates who don’t meet your minimum required qualifications.
Tip: Best Practice is to create a new Campaign for each job posting, however, you can easily Clone Campaigns to make this set up faster each time. Remember, once a Campaign is live and interviews are running, you can't edit the Outline or change any of the Topics. (See Versioning).
Building Your Campaign
Step One: From your Dashboard, click New Campaign in the left side menu.
Tip: Before you begin, have the Job Description ready. It’s optional, but it’ll make the setup faster.
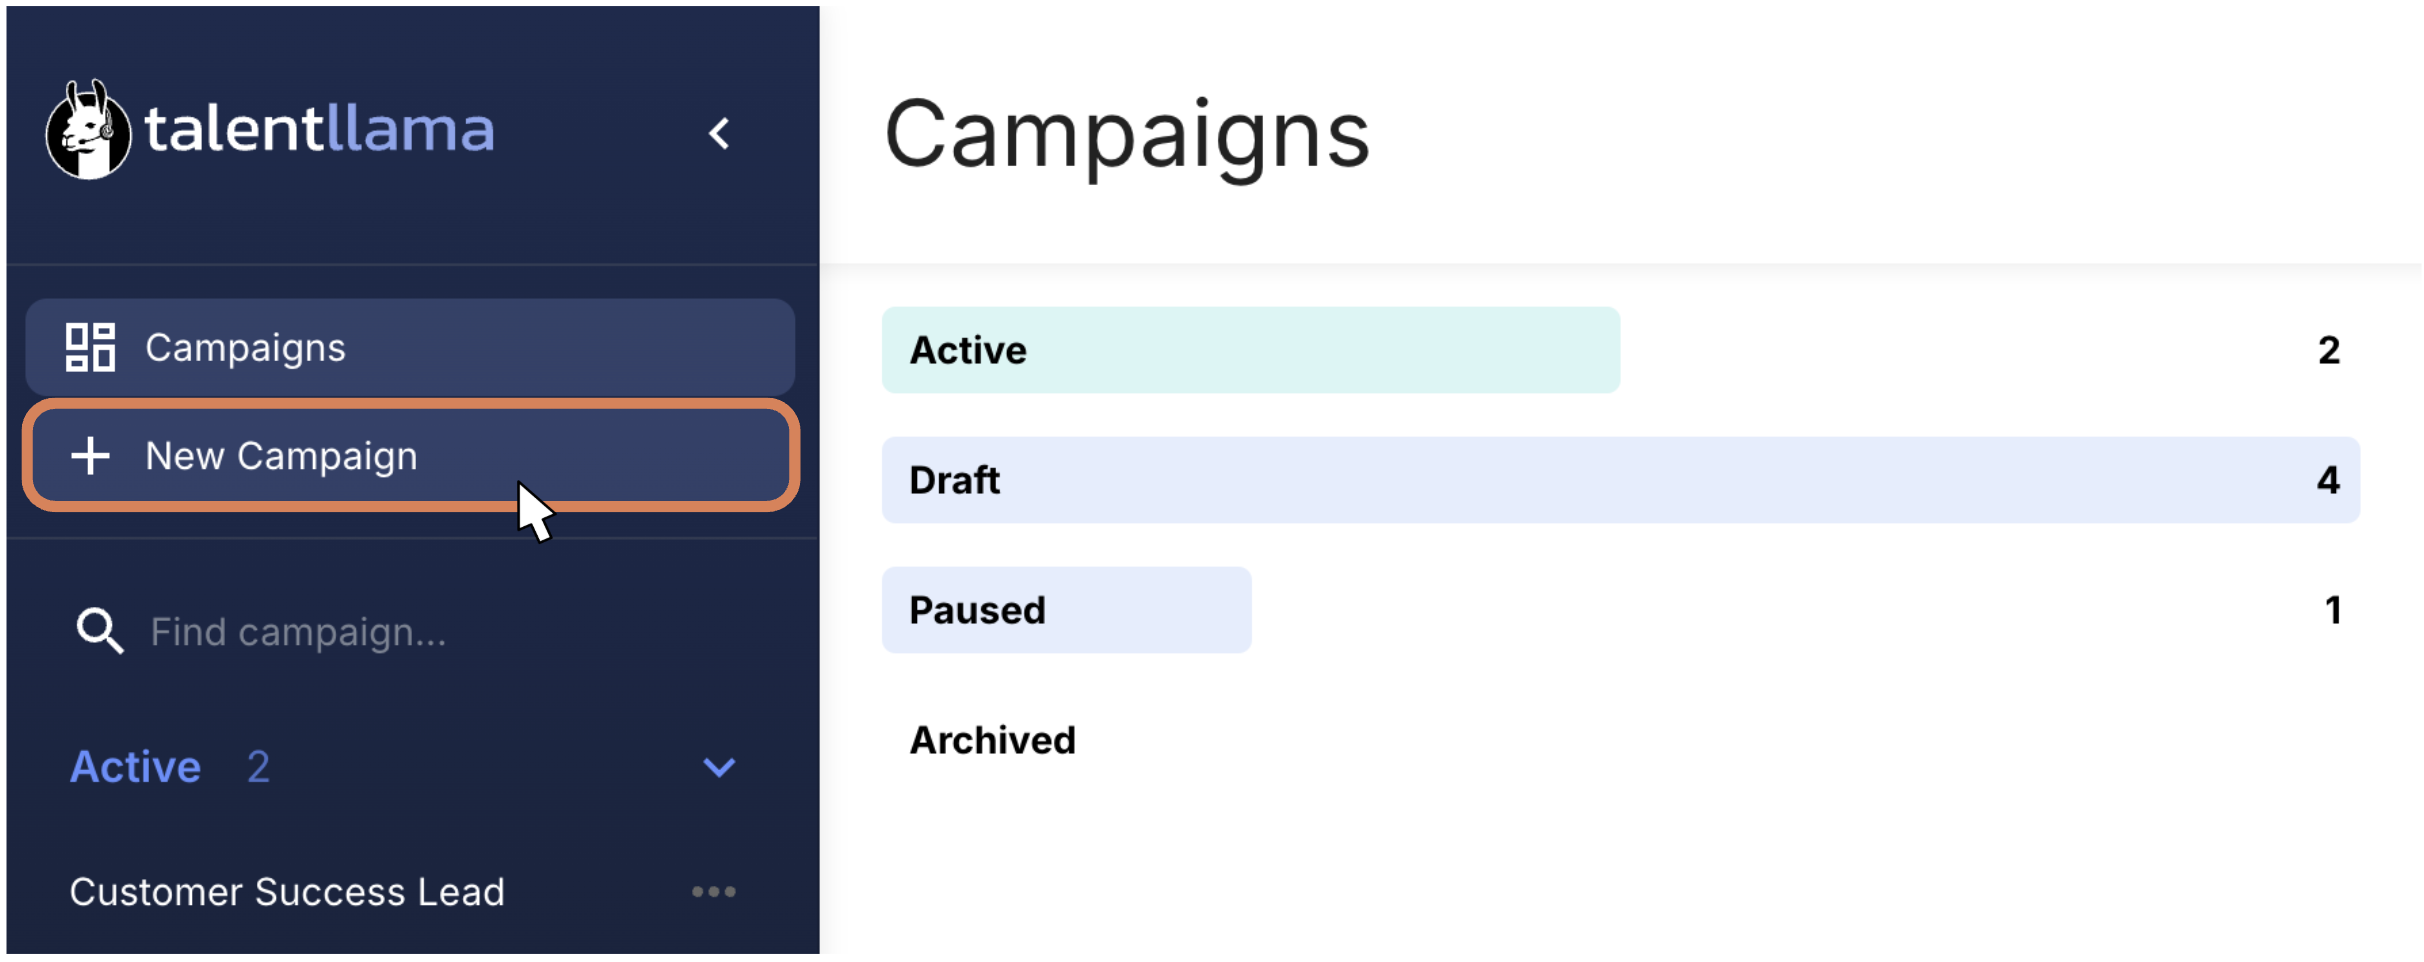
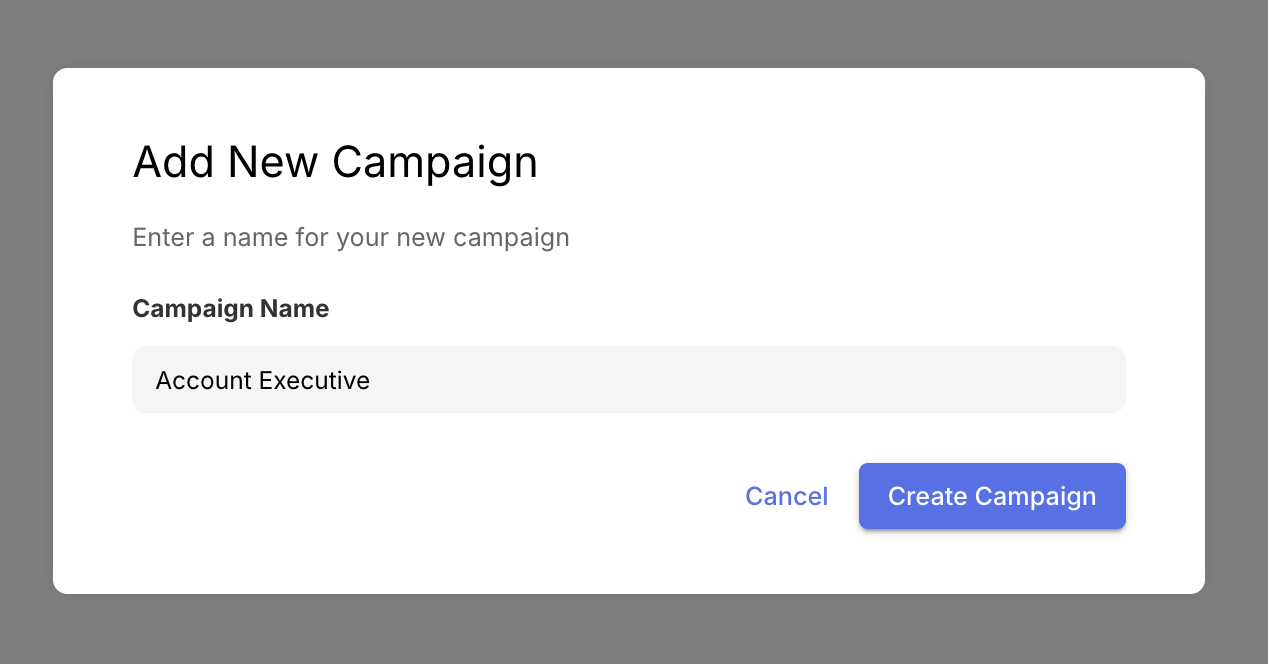
And then add a name for your Campaign. (This could be the job title, job ID number, etc. This particular data field is only visible to you).
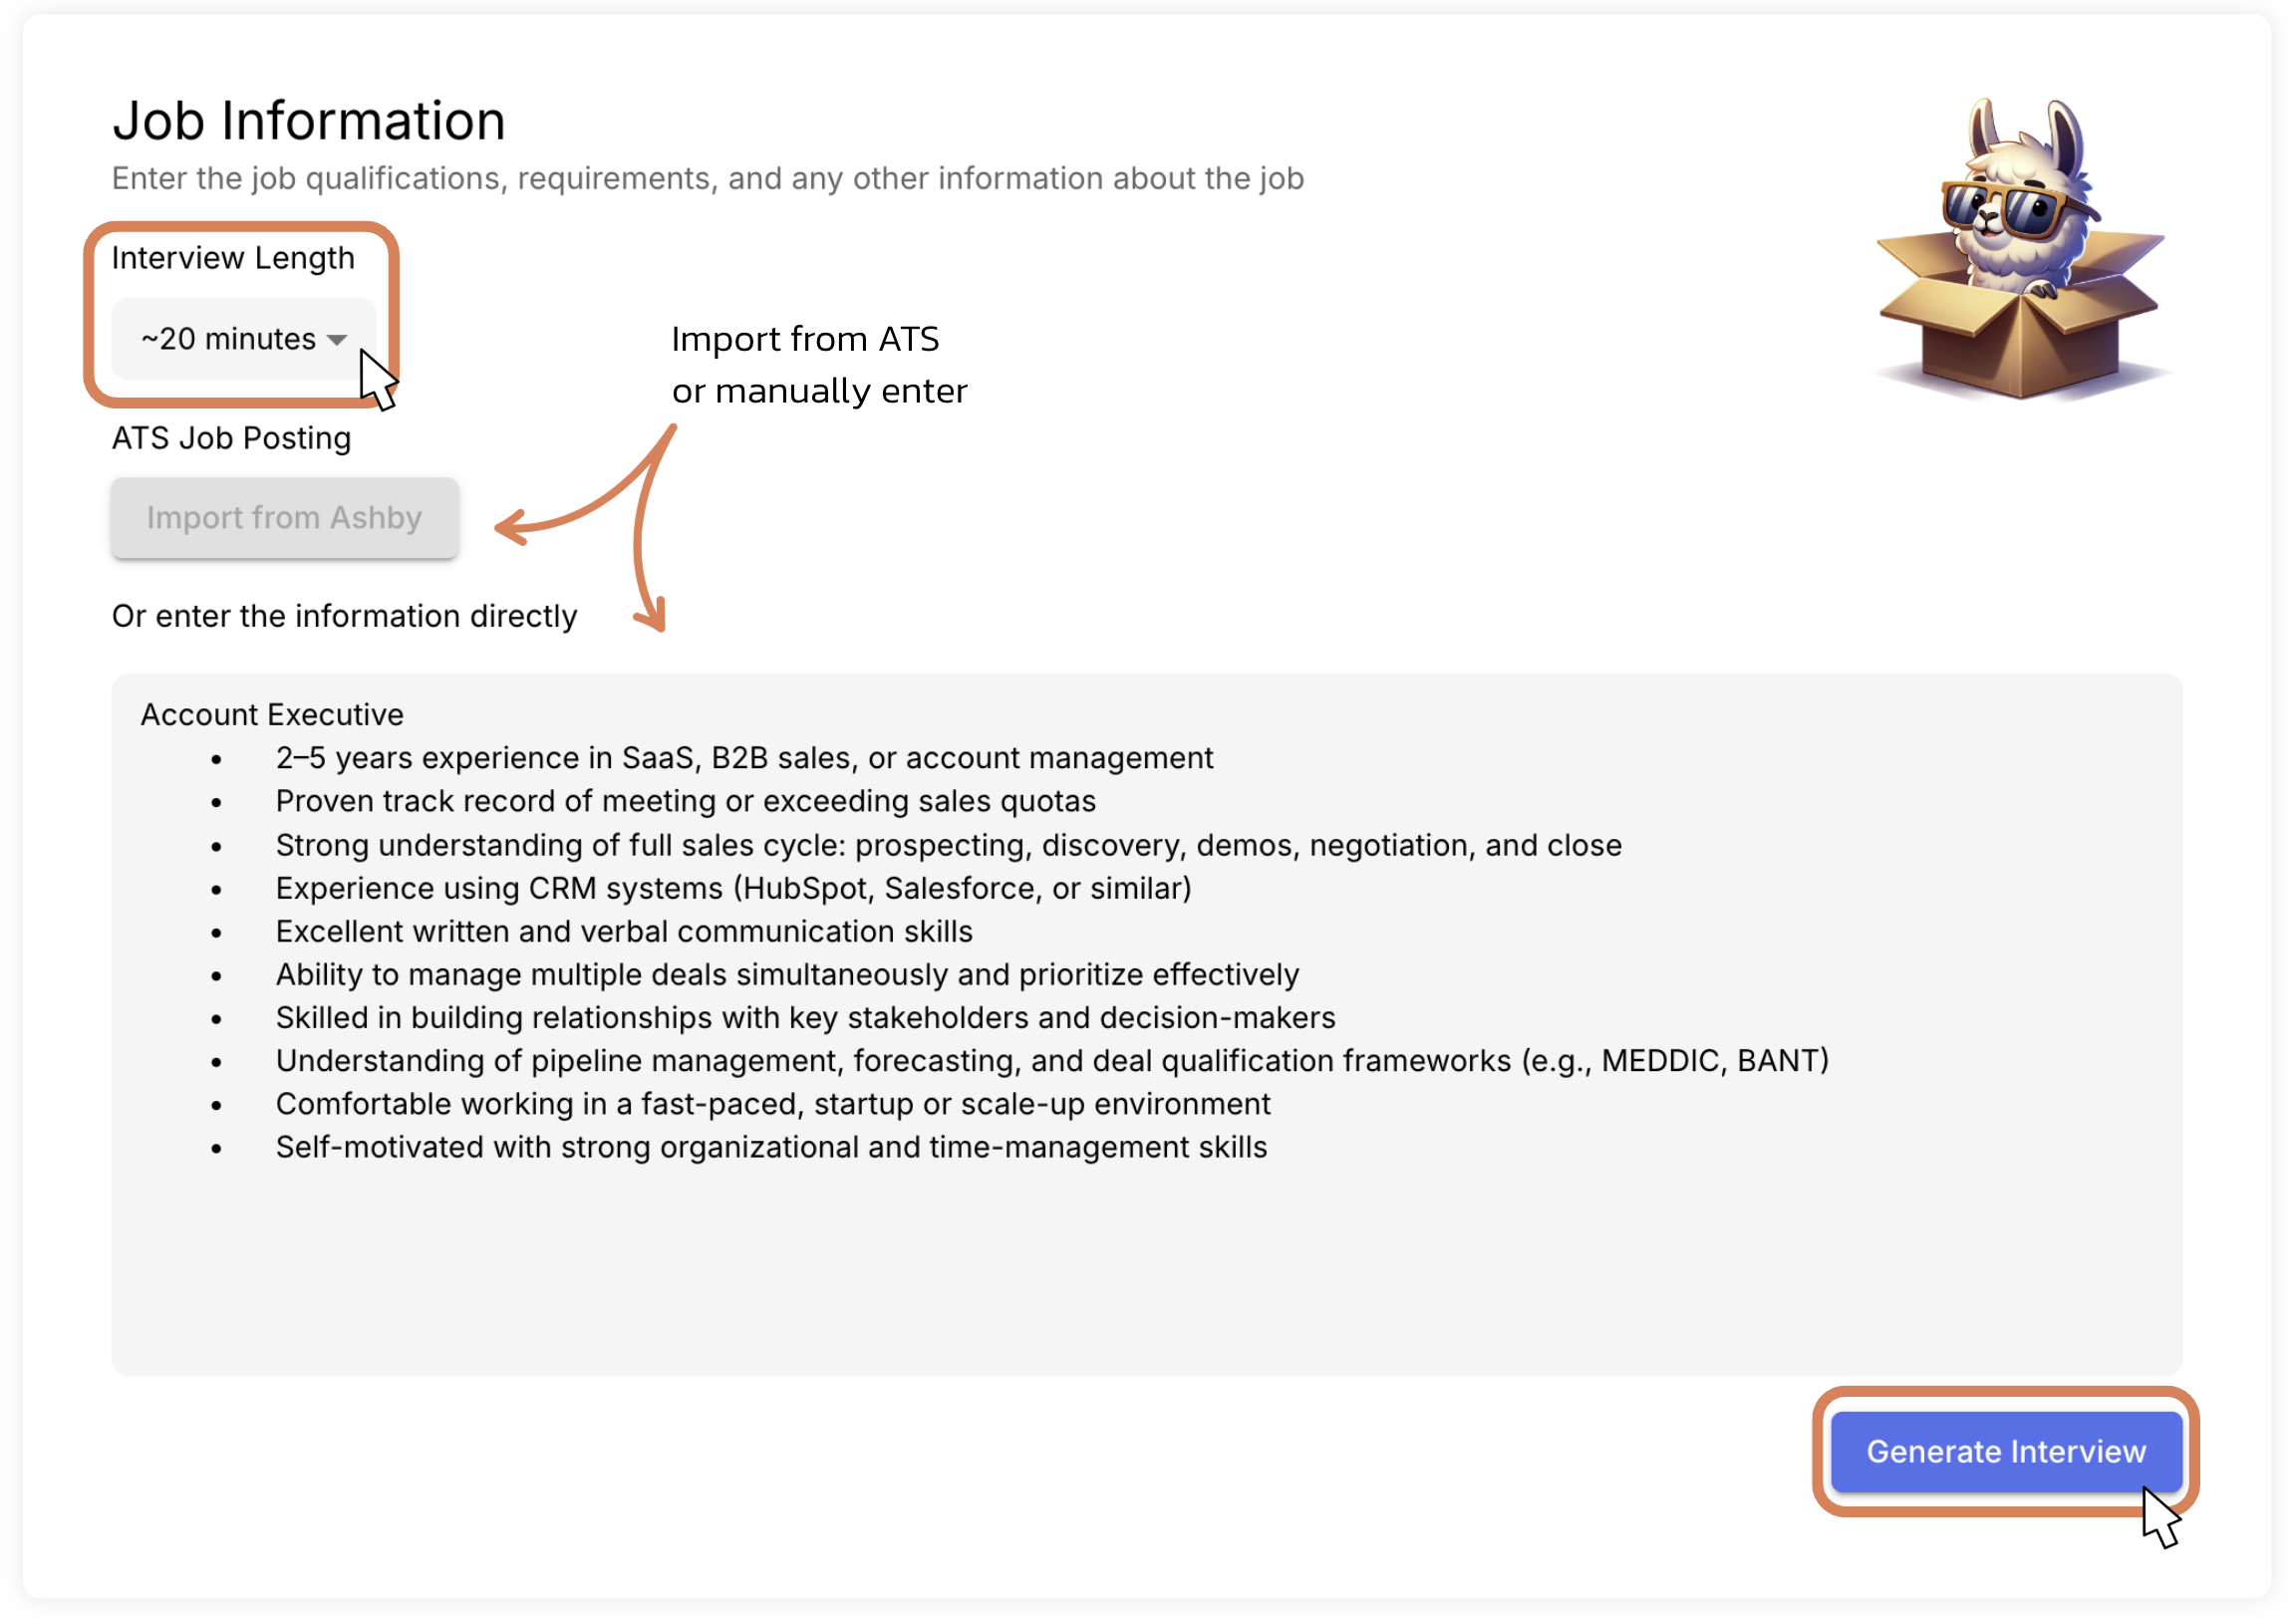
Step 2: Select your Interview Length. This sets the approximate duration of the interview and generates enough Topics to fill that timeframe.
Then, either import your Job Posting from your ATS or manually enter your Job Post directly into the text box.
(When pasting your job description manually, include only the Qualifications, Requirements, and other details specific to that role. Compensation and benefits are on the following screen. If you're importing the role from your ATS, we'll take care of this information for you).
Then, click Generate Interview.
Tip: Select a longer Interview Length so Talent Llama will generate more Topics for you. That way, you can select the Topics you really want, and remove the ones you don't without needing to spend too much time customizing.
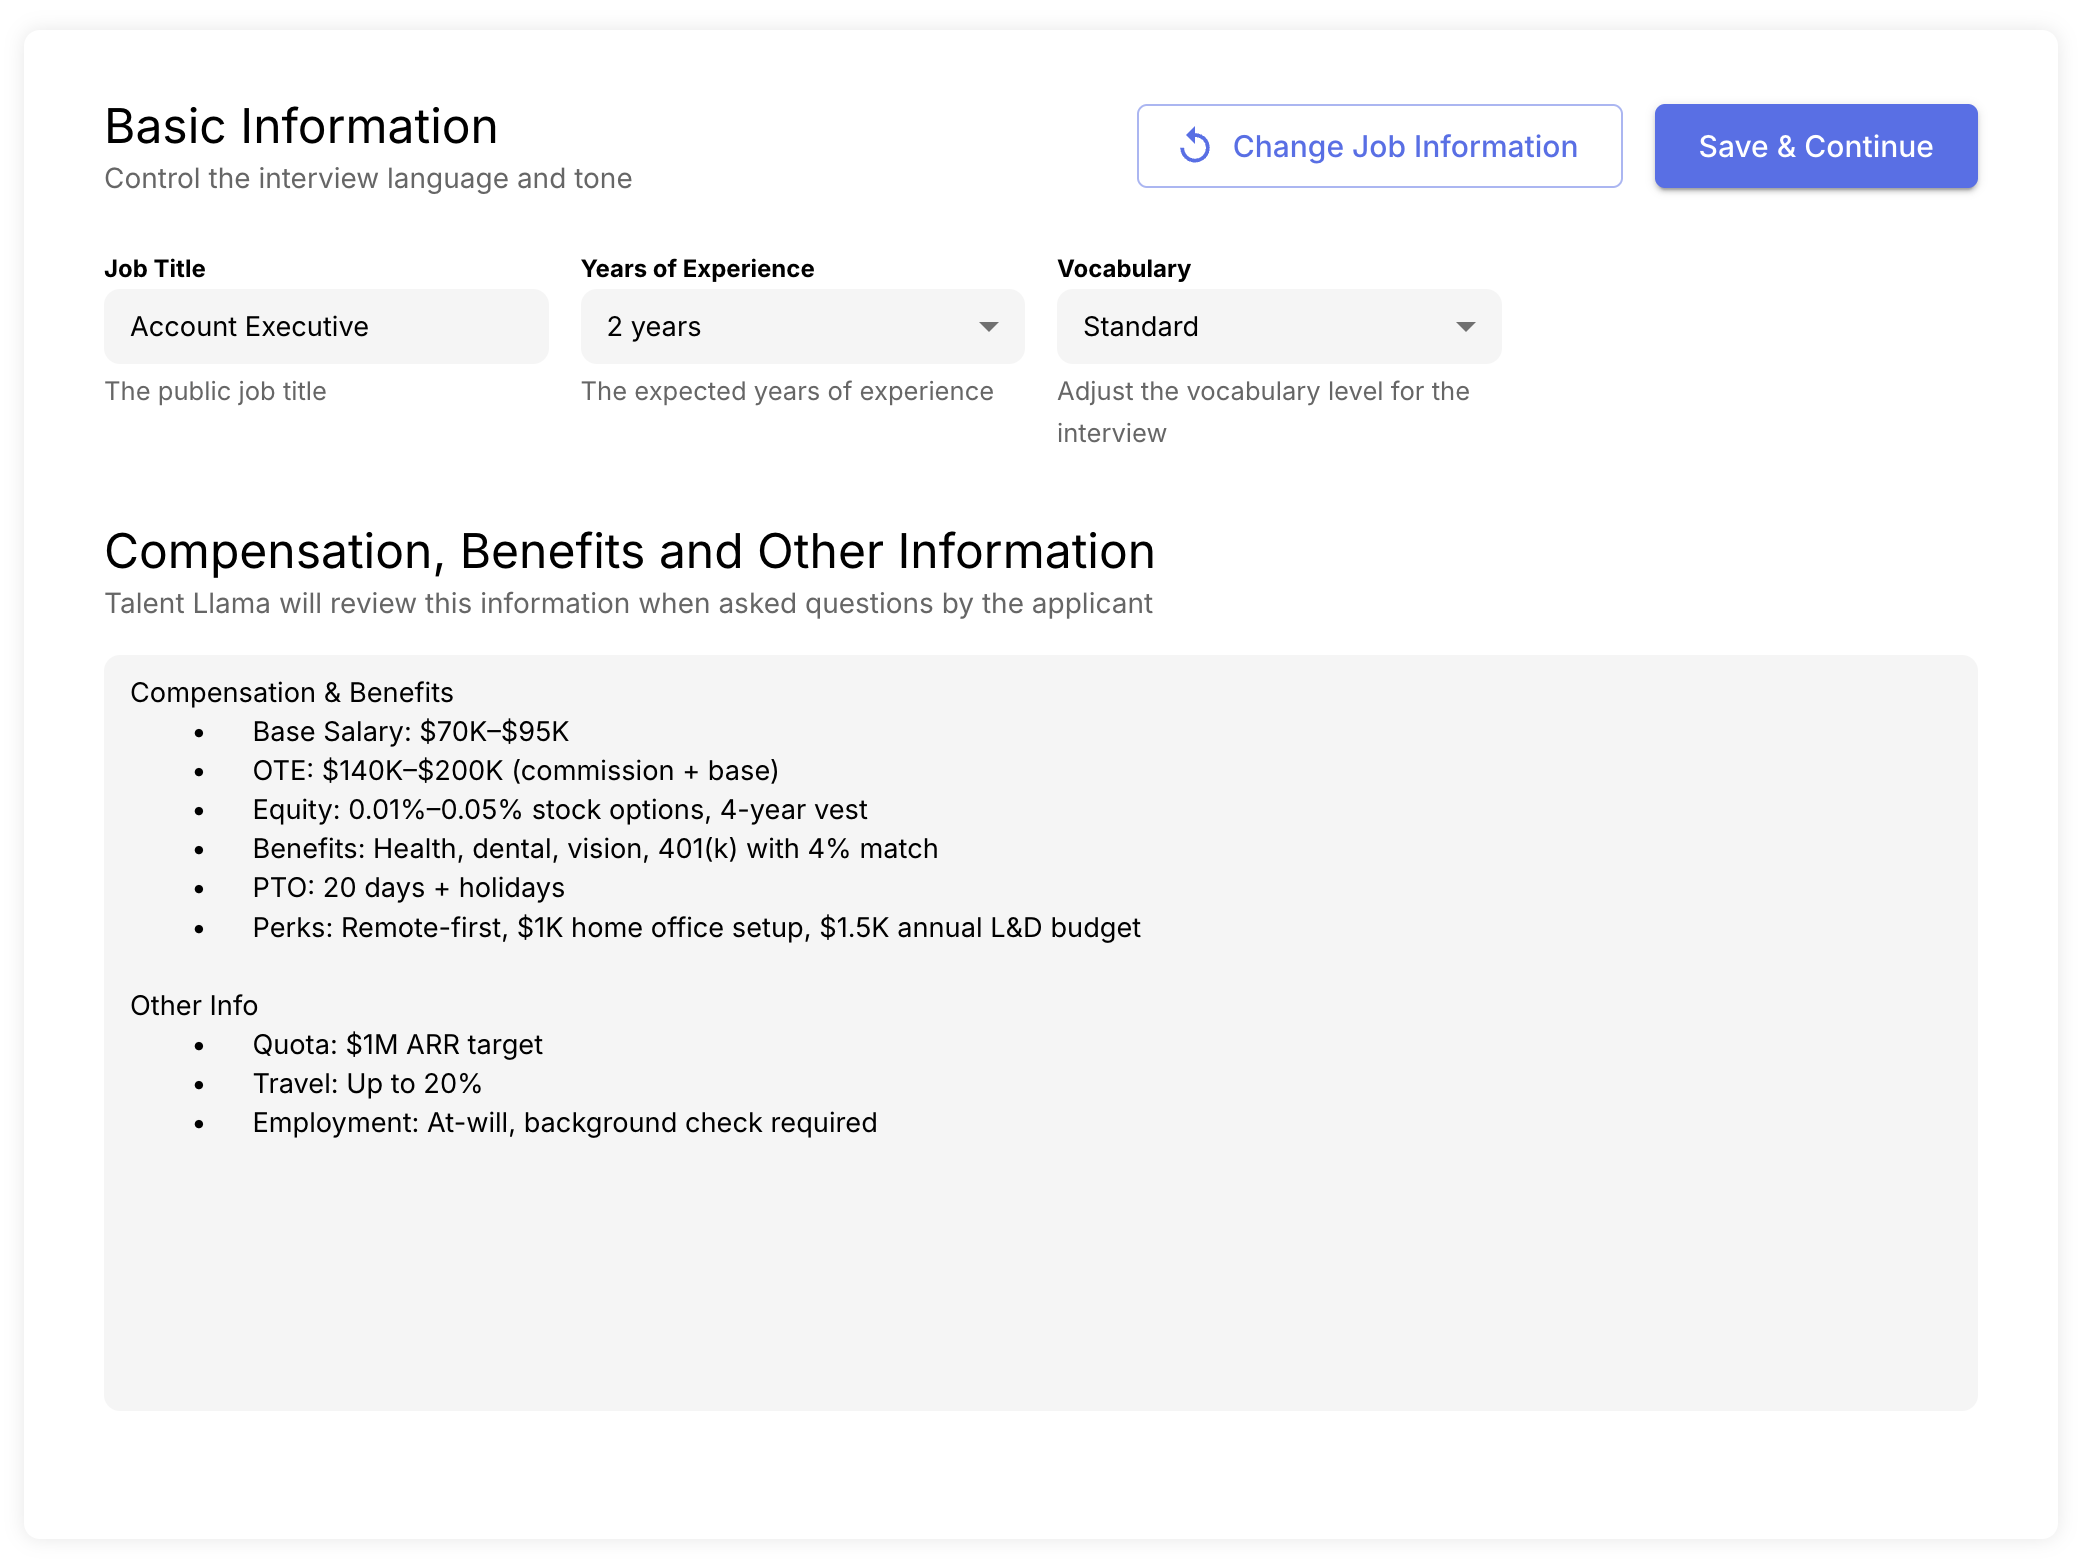
Step 3: On the next screen, we've pre-filled the Job Title (this field is visible to candidates), Years of Experience and Vocabulary, but you should review them here. (If you have Multi-Language Support on, you'd see that setting here too).
You'll also need to enter the Compensation, Benefits and any other relevant information relevant to the role or, more generally, the company (like company values, etc).
Years of Experience will assist in the creation of interview Topics; and Vocabulary will adjust how the AI speaks to the candidate.
Tip: For entry level/junior/frontline/blue collar positions, you can use Simplified or Standard vocabulary. If you're hiring senior or more experienced roles, you could used Standard or Sophisticated vocabulary. For the majority of roles, Standard is more than enough.
Once that's done, click Save & Continue in the top right.
Step 4: Now it's time to customize the actual Outline itself.
Talent Llama will generate a number of Minimum Qualifications and Topics based on the interview length you selected and the job posting you imported. You can edit or remove any Min Quals or Topics that may not suit you, and of course, you can add new ones too!
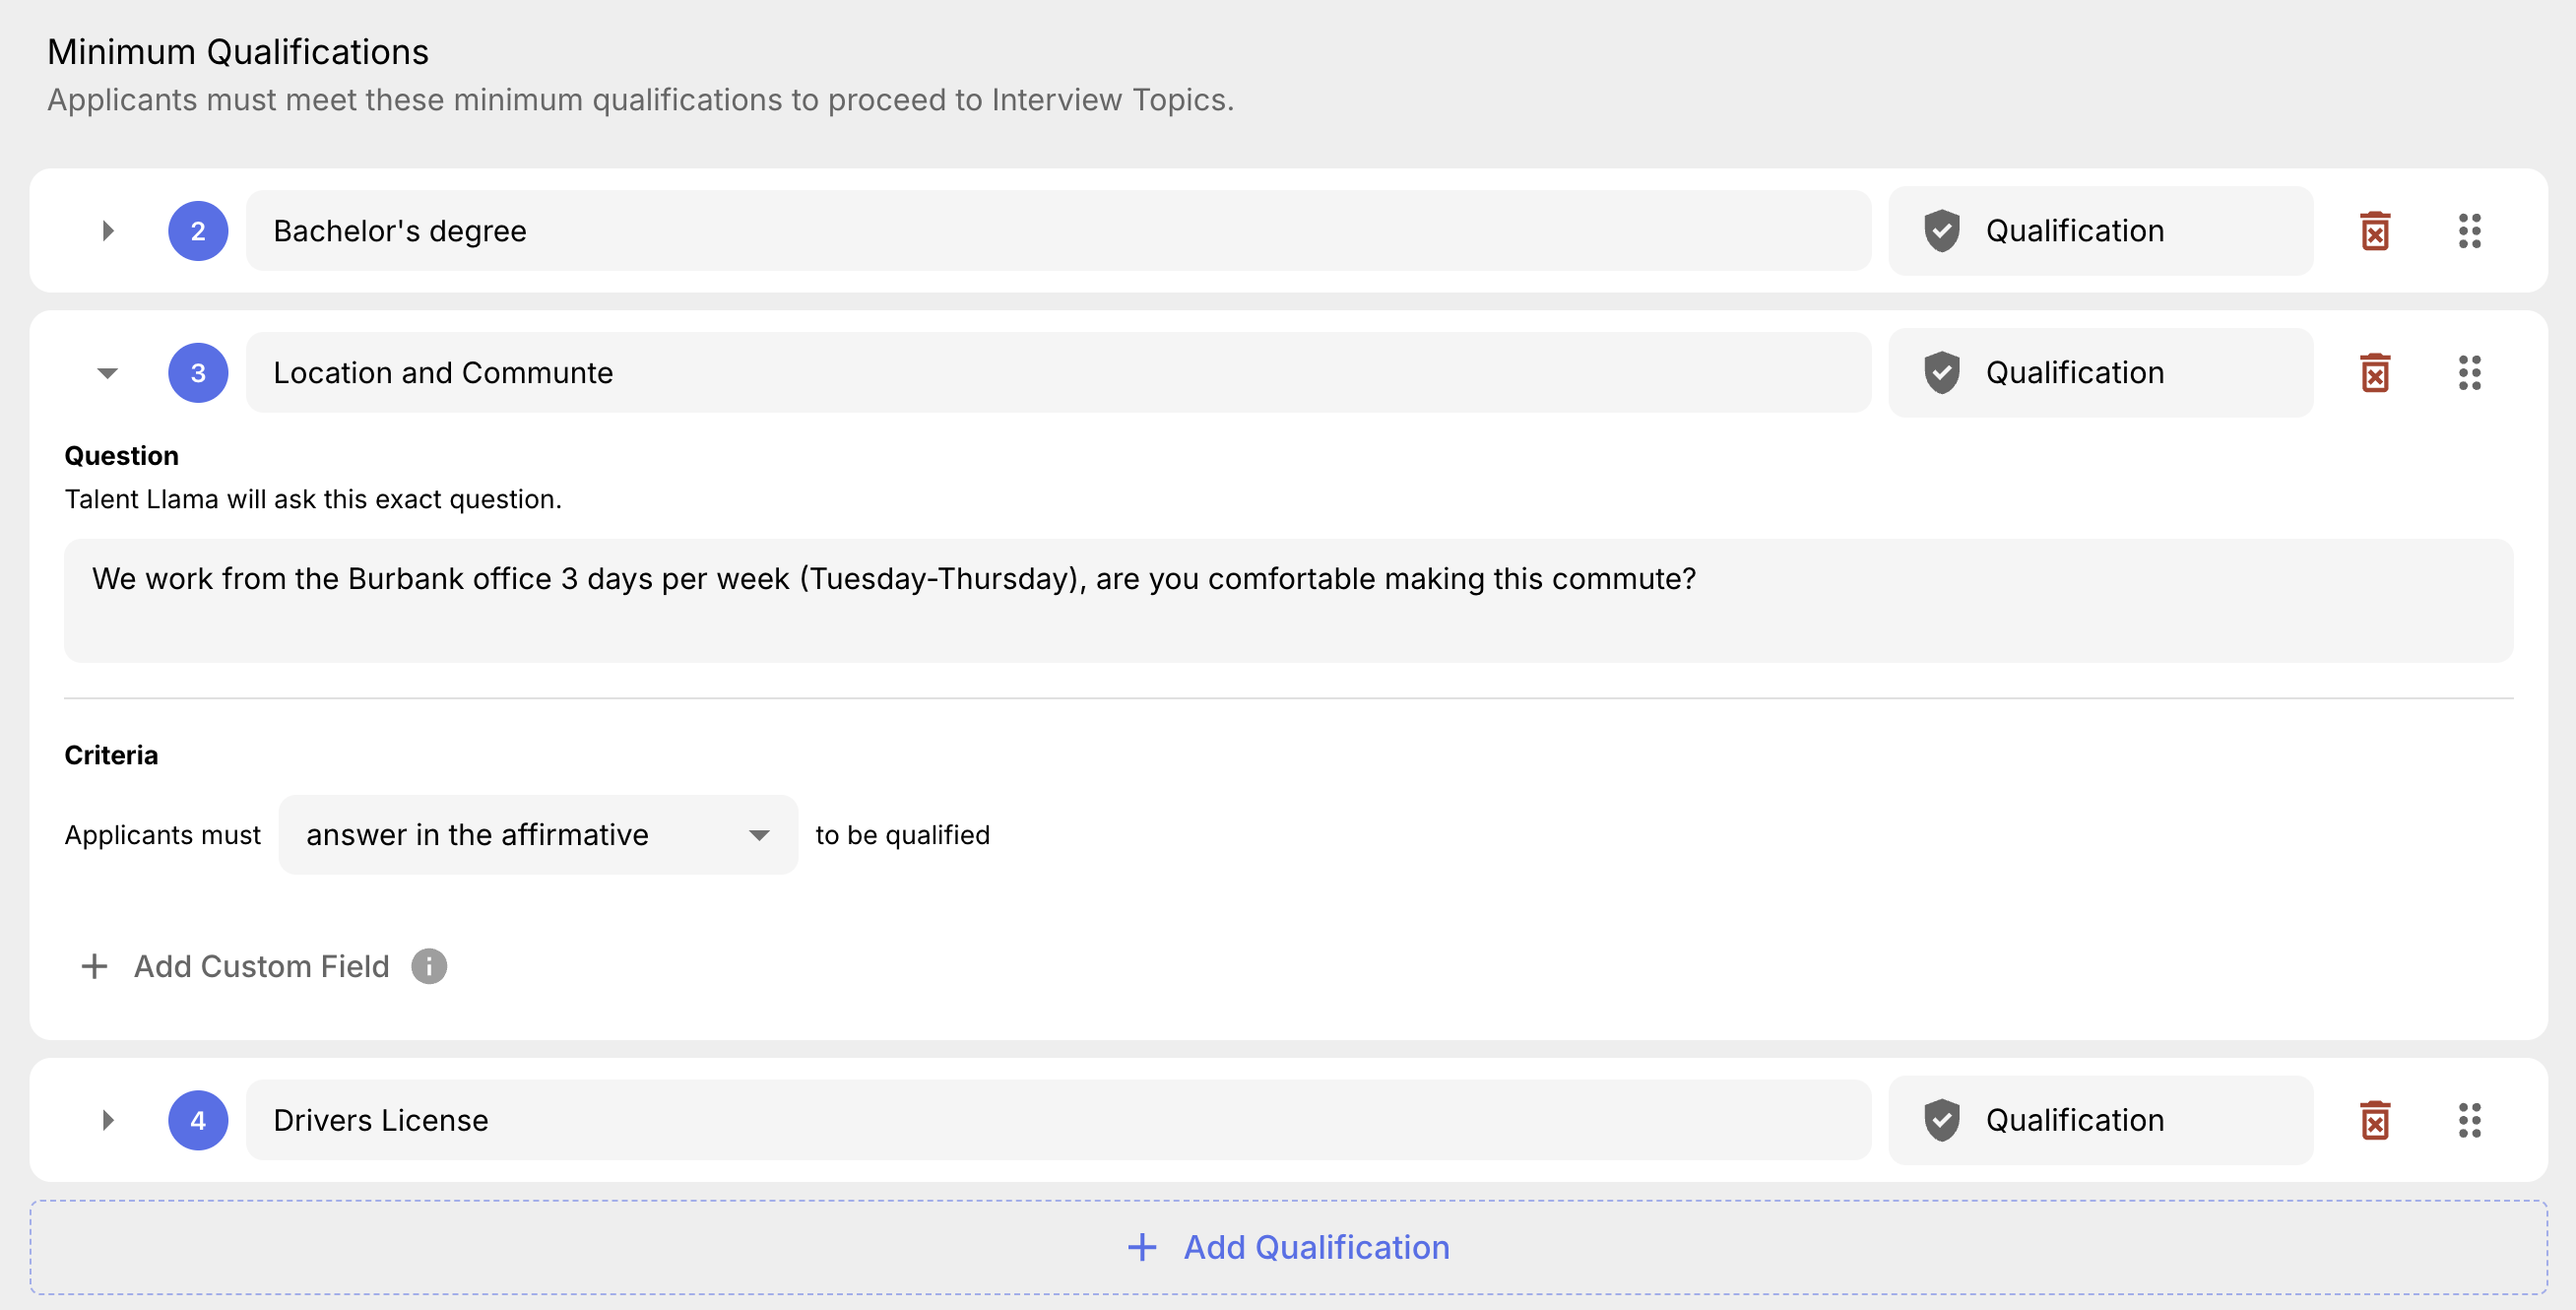
Best Practice is to have at least one Minimum Qualification to help surface qualified applicants.
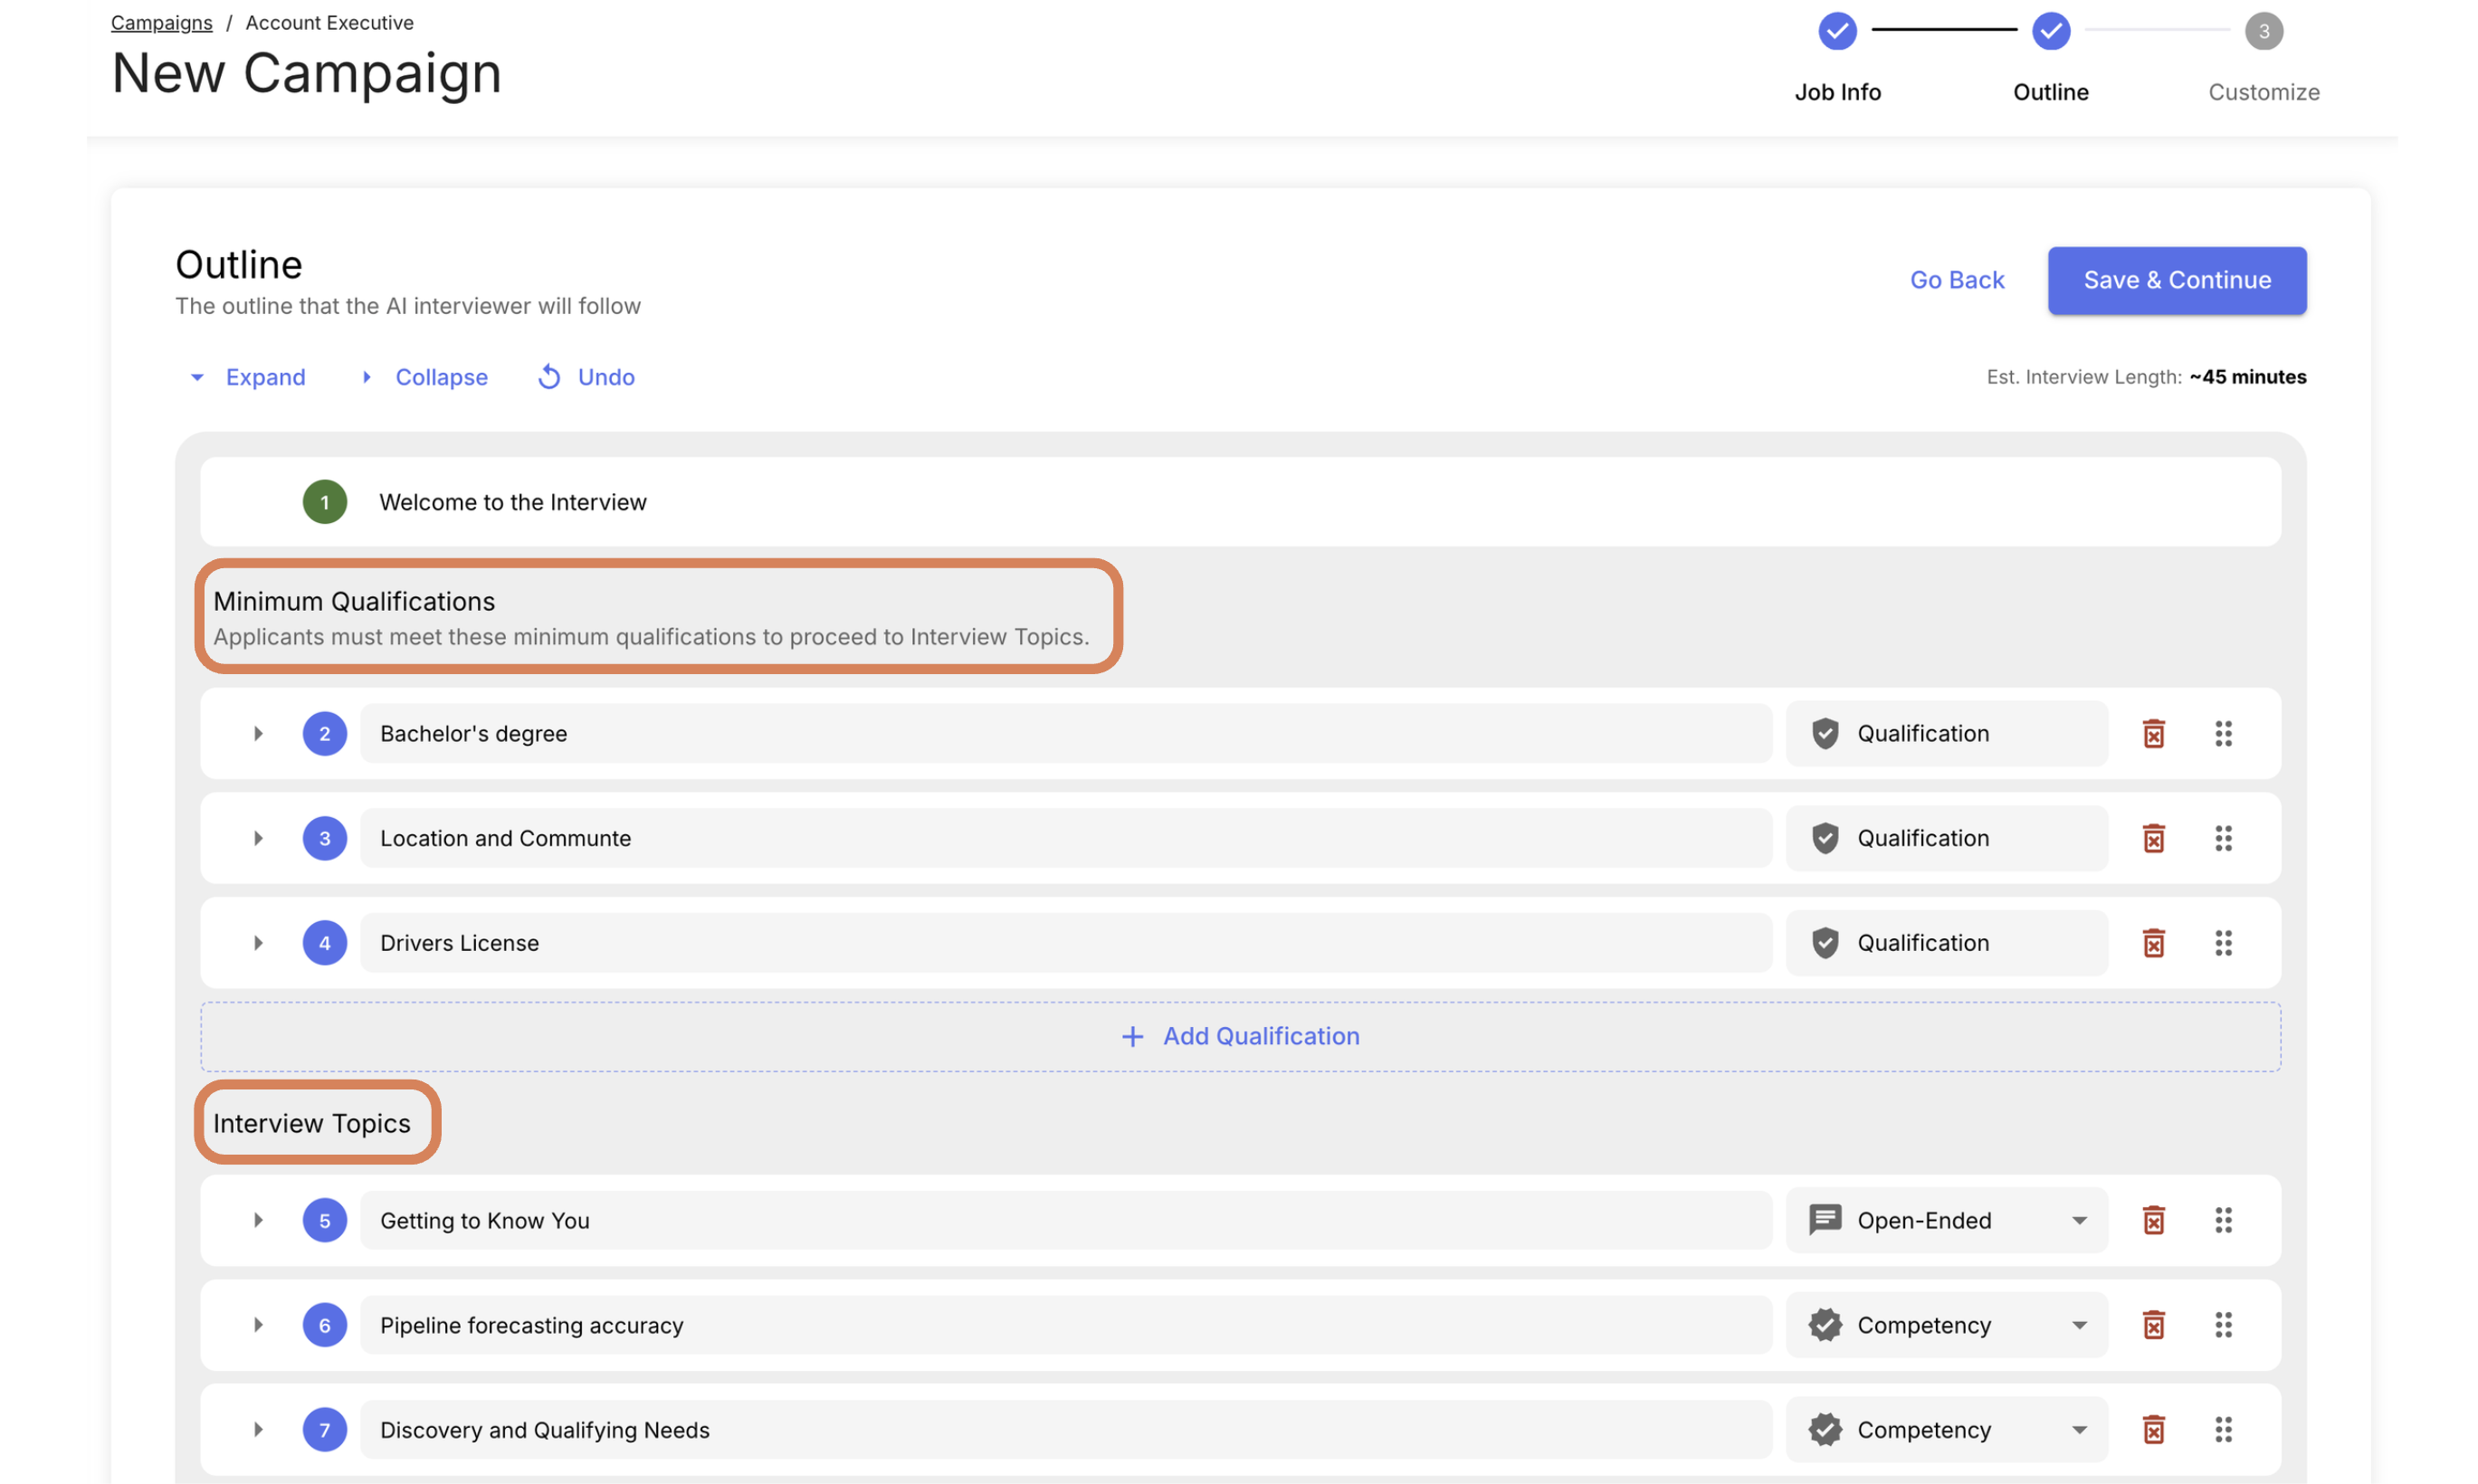
A relevant example of a Minimum Qualification could be Location or Commute. Since many companies now operate in a hybrid model, you might require that applicants live within driving distance of your office. If an applicant indicates they don’t meet that requirement, the AI Interview would politely conclude soon after, as they haven’t met the Minimum Qualification.
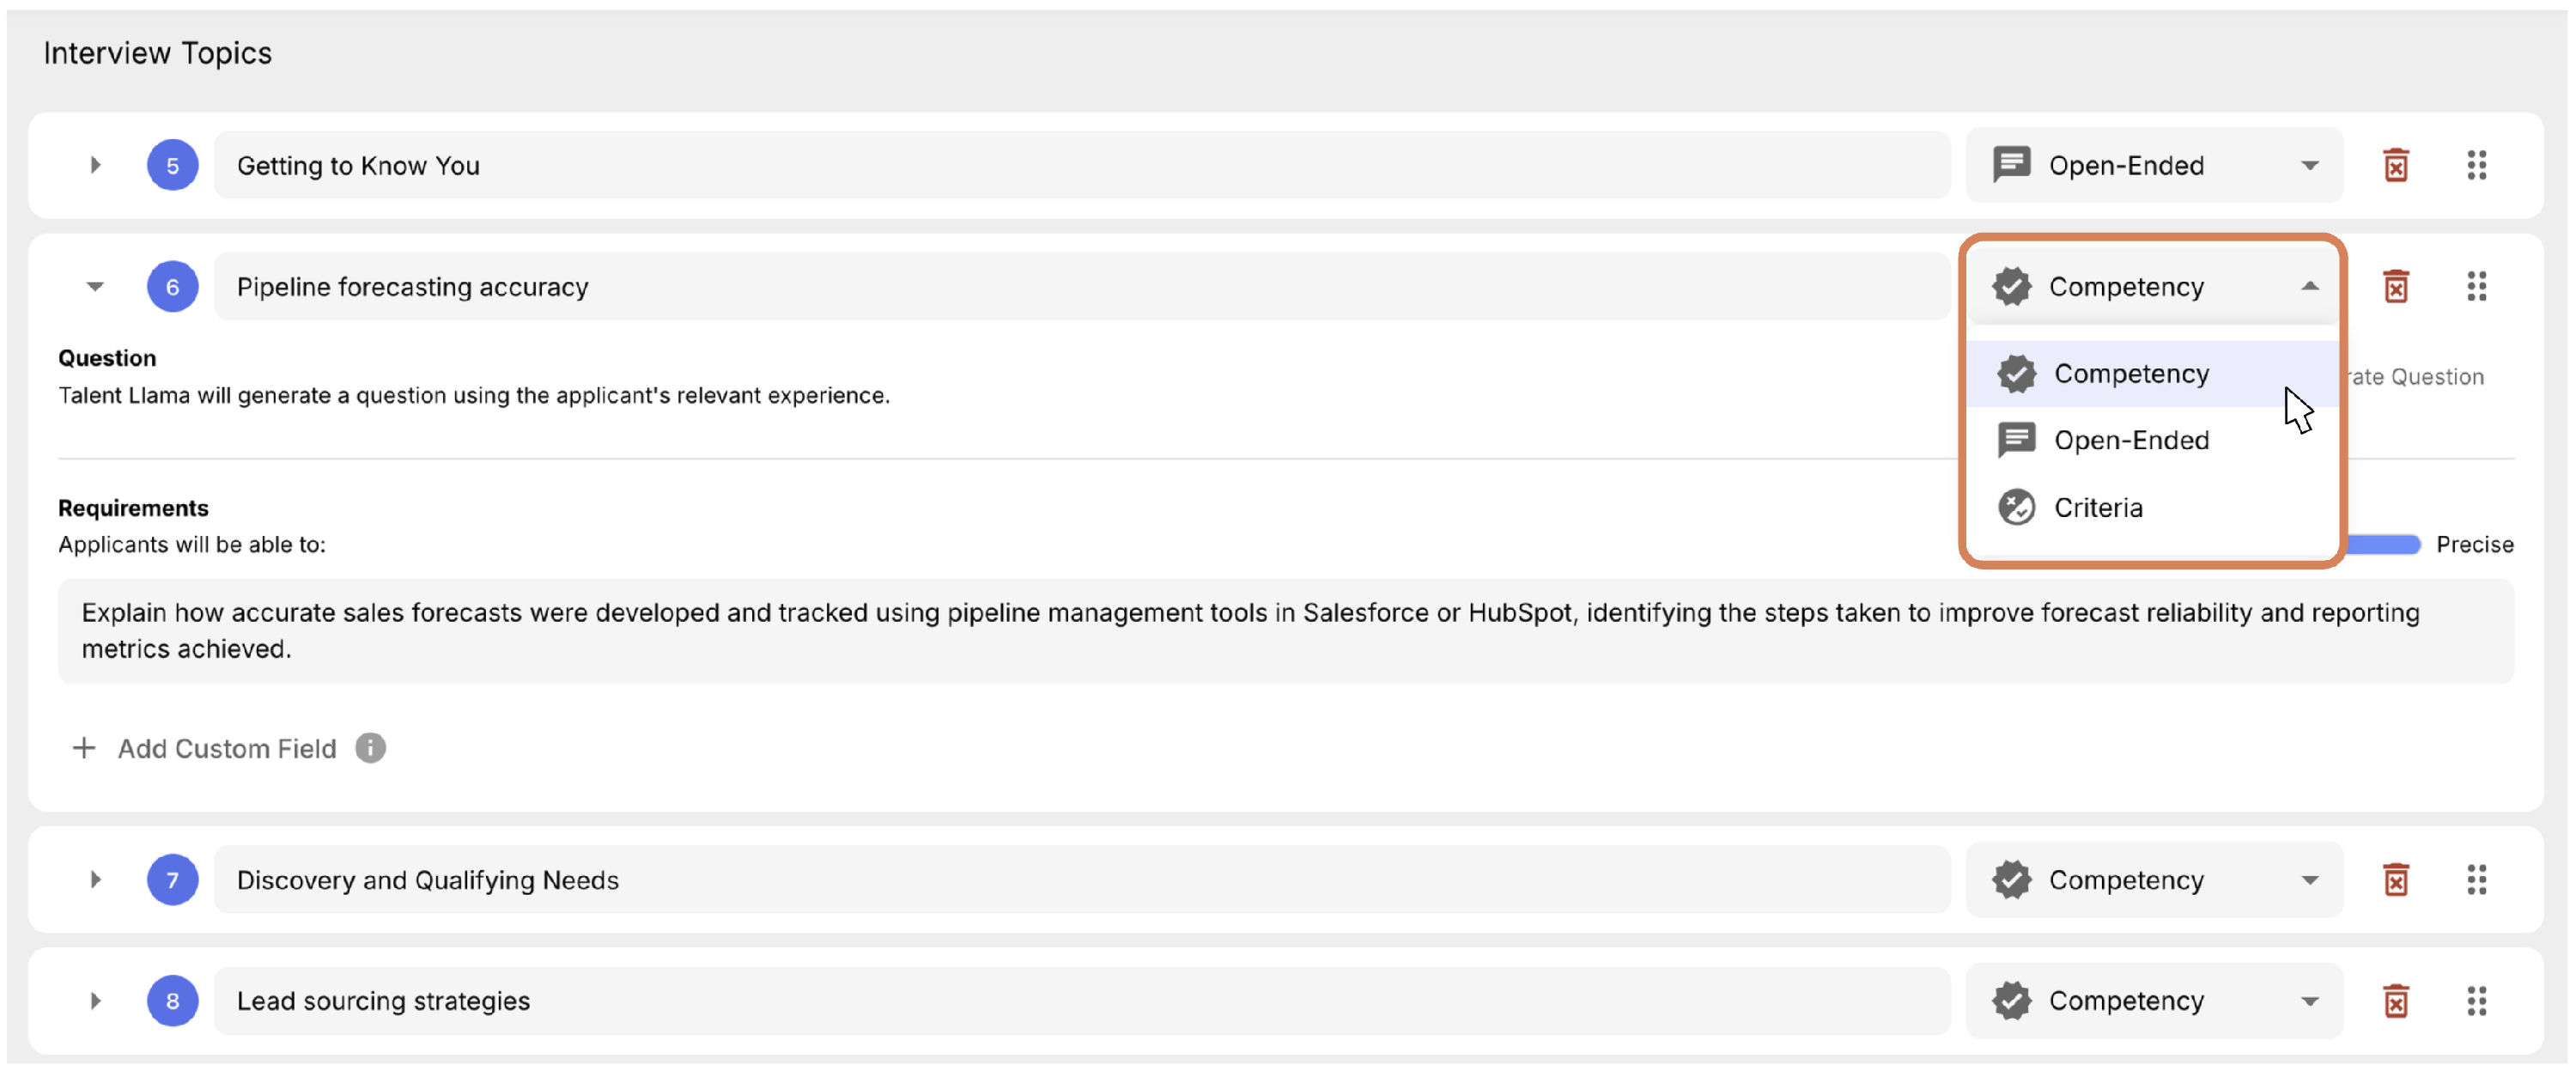
There are multiple types of Topics you can set. Competency, Open Ended, and Criteria are the choices here (ask about the Typing Test Topic!). We have an in-depth help article here breaking Topics down, to ensure you use the best type for your interviews.
Finally, once you're satisfied with your interview, click Save & Continue to move on to confirming your branding.
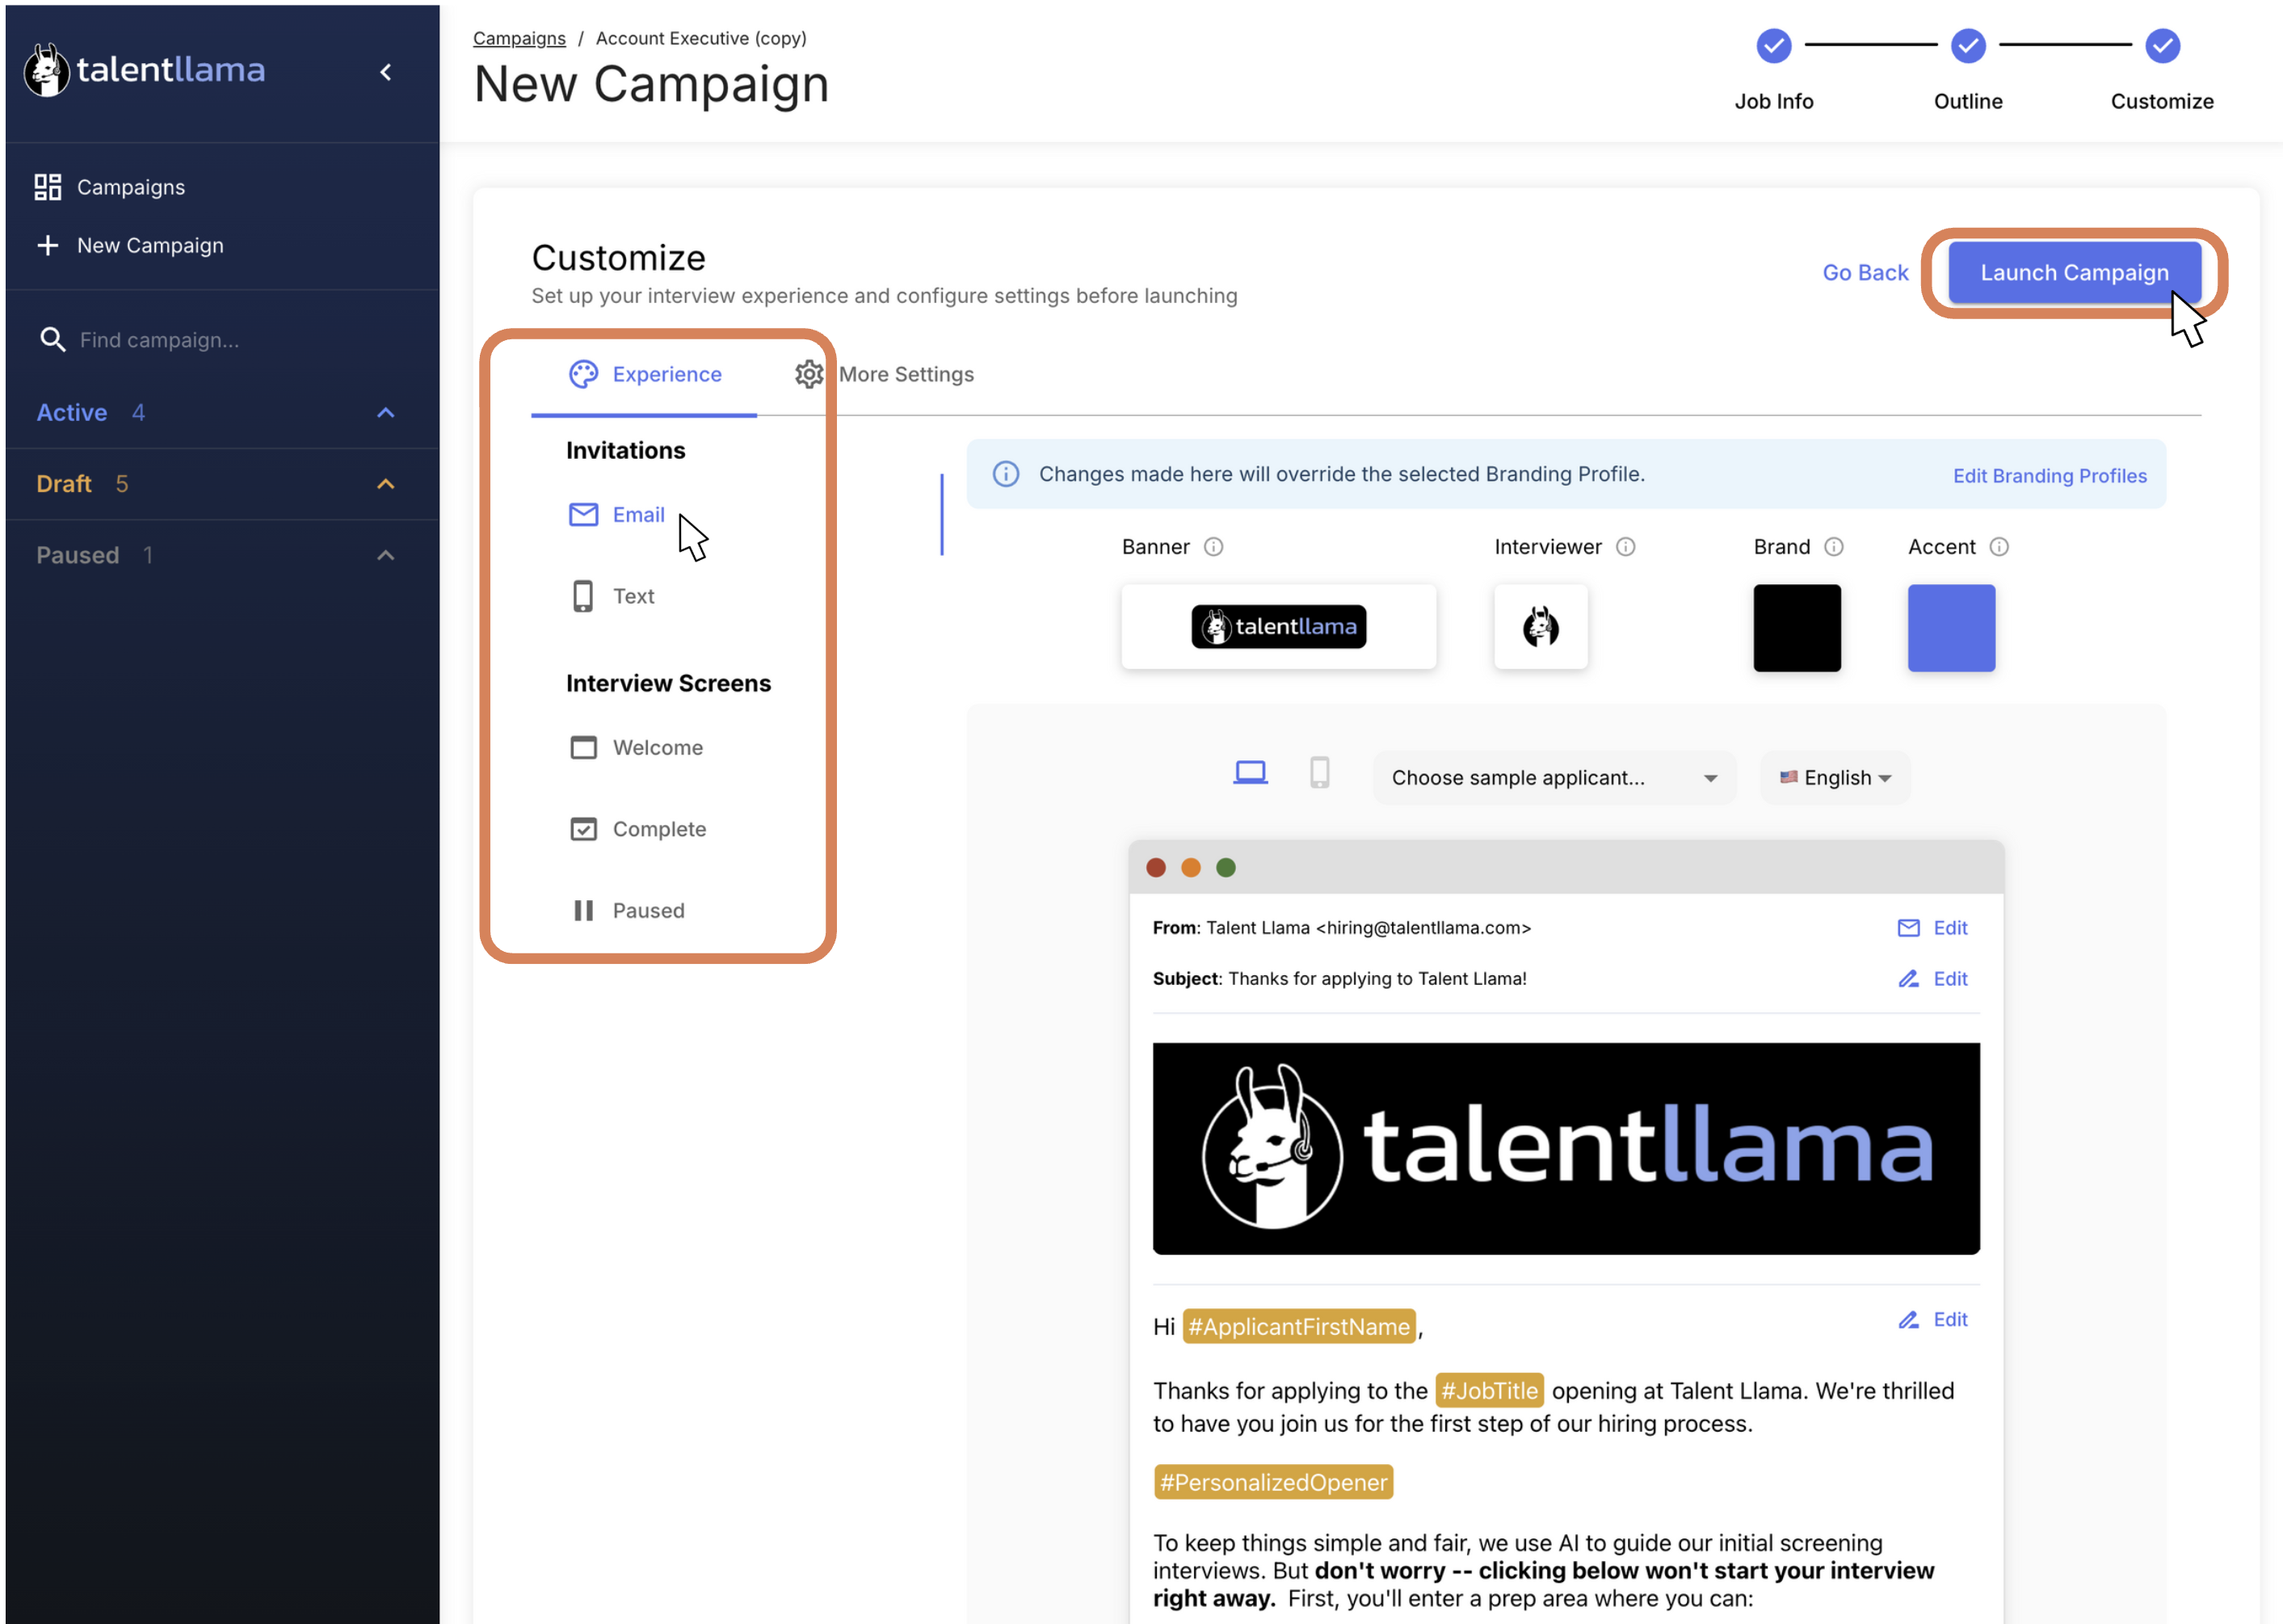
Step 5: Branding time. There are two ways to adjust your Branding. We'd recommend having your Account Level Branding (essentially the Default Branding) set up first to make this stage faster. You can read about that here.
Adjusting Branding from within your Campaign Builder will not change your Account Level Branding, it will simply change it for this singular Campaign.
If thats all good to go - go ahead and click Launch Campaign. Don't stress, this will not immediately start sending emails to anyone - you'll review that one more time on the next screen.
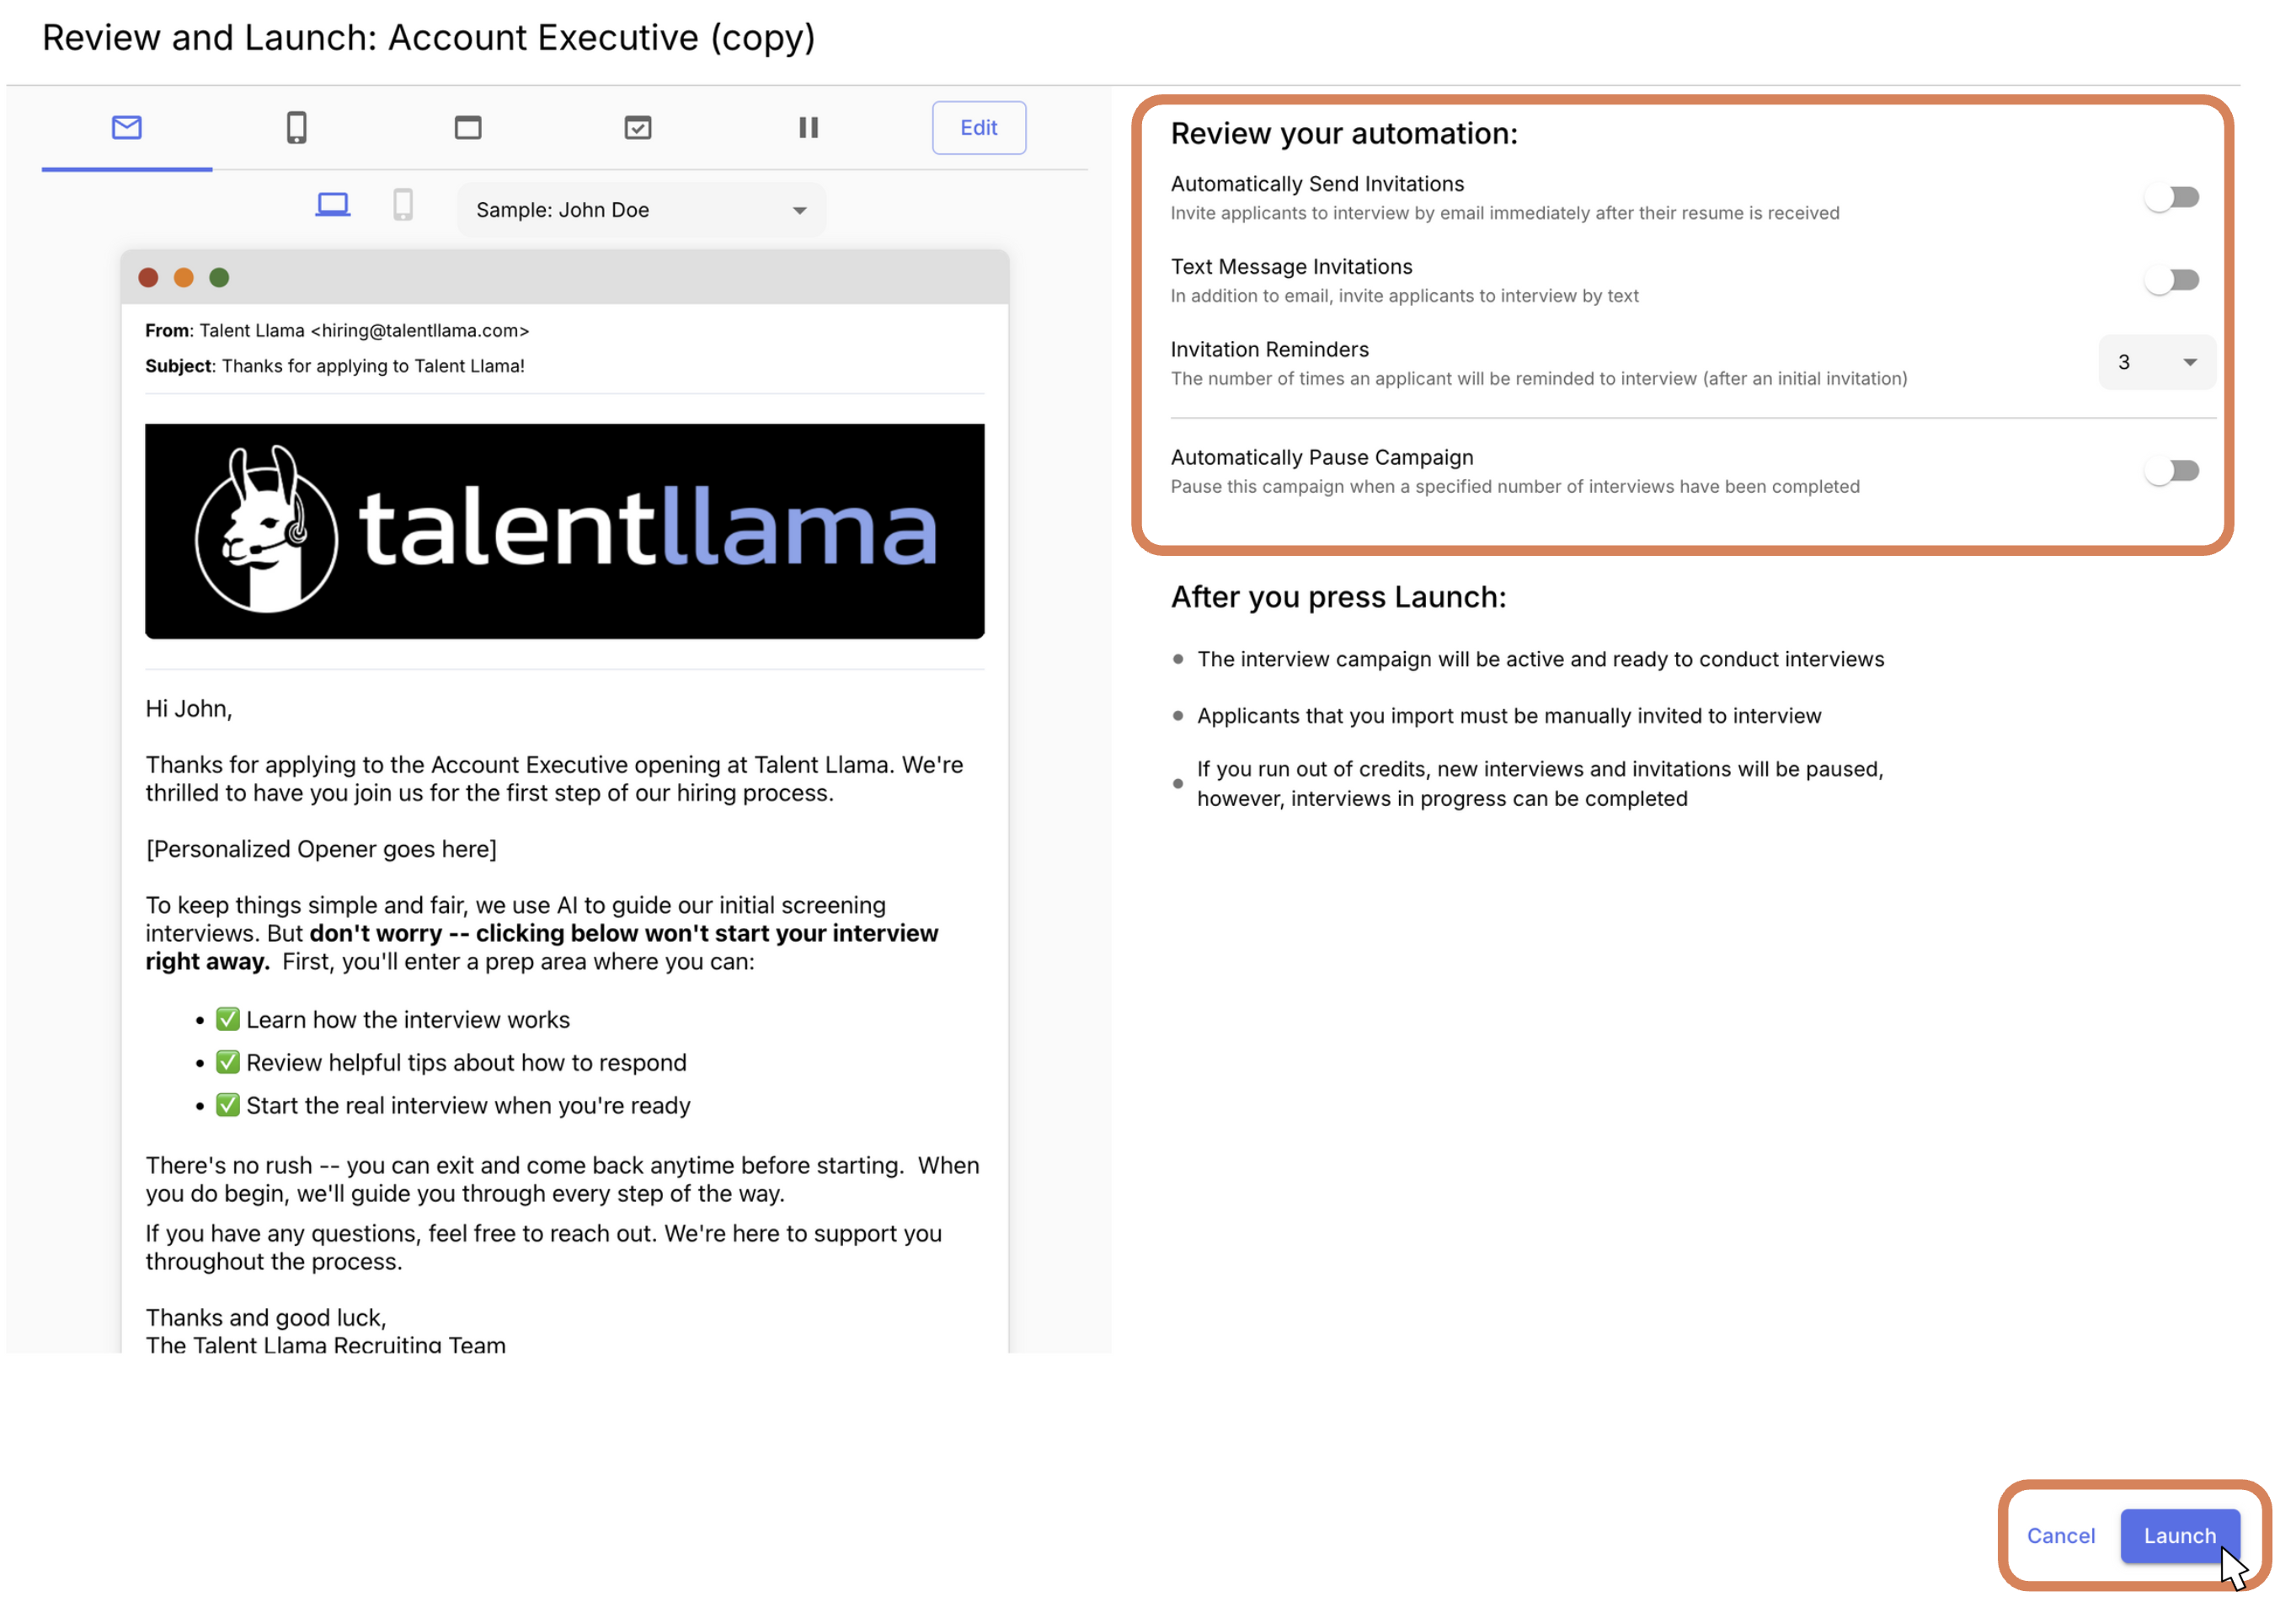
Step 6: After you've clicked Launch Campaign, you have the option to:
- Immediately begin sending Email Invitations
- Immediately begin sending Text Invitations
- Customize Invitation Reminders (one reminder per day)
- Automatically Pause your Campaign after X amount of applications
You do not have to turn anything on, if you want to manually run the campaign, go ahead and leave everything off - and then click Launch. You'll be able to manually grab the invitation links once you import applicants.
If you're ready to automate sending, turn on the Automatically Send Invitations toggle and click Launch. Any applicants already in the stage you selected during the setup from your ATS will launch immediately, and you can manually add applicants at any time too!
If you need help, reach out your Customer Success Manager, or email support@talentllama.com for assistance from our Support team.